Nutella Swirl Rolls

What would you get if you crossed Lily Tomlin with Jane Fonda? Nutella. Get it? Let me spell it out for you: Nut (Zany Lily) + Tella (Jane as Barbella) = Nutella. I’ve been laughing my way through episodes of “Grace and Frankie,” the Netflix comedy series starring Tomlin, Fonda, Martin Sheen, and Sam Waterston. I’ve been watching it with my daughter, who recommended it, and I keep meaning to show her clips of Tomlin’s comedic brilliance.

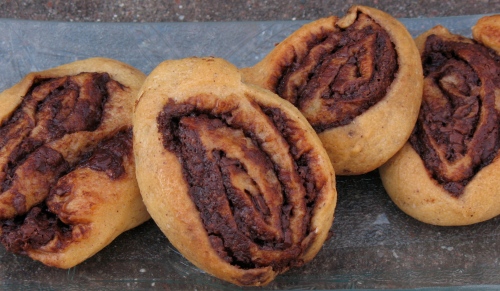
I was thinking about Nutella because of my daughter’s ongoing love affair with it. A few months ago, she zeroed in on a Nutella swirl roll recipe that was in Donna Curie’s  make ahead BREAD: 100 Recipes for Melt-in-Your-Mouth Fresh Bread Every Day. I’ve made them three times now, most recently for my daughter’s 18th birthday breakfast. That time, with her help, they were, in her words, the best ever. After I rolled the dough into a square, she spread Nutella across the surface. I don’t know how she did it, but she somehow was able to spread just the right amount—something I, apparently, failed to do in my two previous efforts.

Currie, a home baker who blogs at cookistry.com, follows a simple two-day method for baking sandwich bread, rolls, breakfast pastries, flatbreads, and more. Two days might seem overwhelming or involve too much planning ahead for most of us, but I find her approach very convenient. On day one you mix, knead, shape, and place the dough in the refrigerator. The next day (within 24 hours), you remove the dough from the refrigerator and heat the oven. You will easily be rewarded with freshly baked breakfast bread on the weekend or rolls, baguettes, or pizza for weeknight meals. Although her recipes aren’t for die-hard artisan bakers, I’ve been pleased with what I’ve baked so far. Her recipe for chocolate buns was the first one I tried because I thought my daughter would like them for breakfast, and she did. I was even surprised when she liked the white-whole wheat honey vanilla buns, which were barely sweet and were 50% all-purpose flour and 50% whole wheat. When trying another of Currie’s swirl bread recipes, I couldn’t resist using the leftover lemon curd that I had in the refrigerator. I kept my fingers crossed that it wouldn’t leak out during baking—and it didn’t. Its lemony kick was like waking up to sunshine.

But none of these stopped my daughter from campaigning for Nutella swirl rolls like a politician in the final days before an election. Nutella swirl rolls might sound a bit over the top—and I guess they would be if you ate them for breakfast every morning. My daughter, however, would argue it’s the perfect way to start the day. I usually don’t enhance dough with sugar, butter, or chocolate—and especially not Nutella, but if these are the way to my daughter’s heart, well, then, this dad is gonna do what he’s gotta do.

What would you get if you crossed Nutella with dough? One very happy daughter.

Nutella Swirl Rolls

Nutella Swirl Rolls

Nutella Swirl Rolls (from make ahead BREAD)

1 cup room temperature water

2¼ teaspoons active dry yeast

2½ cups (11¼ ounces) bread flour, plus more as needed

2 tablespoons sugar

1 teaspoon kosher salt

½ cup hazelnut meal (If you can’t find hazelnut meal, make your own: Grind skinned hazelnuts until they’re the texture of coarse sand.)

Nonstick baking spray

1 cup (8 ounces) Nutella

On Prep Day

  1. Combine the water, yeast, flour, sugar, salt, and hazelnut meal and knead by hand (mix first in a large bowl, then turn out and knead) or in a stand mixer fitted with the dough hook until the dough is elastic.
  2. Cover the bowl with plastic wrap and let the dough rise until it has doubled in size, about 1 hour in a warm room.
  3. Spray a 9 x 13-inch baking pan with baking spray.
  4. When the dough has risen, flour your work surface and turn out the dough. Pat it into a rough square shape, then use a rolling pin to roll it to about 16 x 24 inches.
  5. Spread the Nutella on the dough in as even a layer as possible. It’s easiest to dollop on the Nutella, then spread it in that area rather than trying to spread it all from one large blob. Leave about an inch of the dough uncovered on one of the short ends.
  6. Starting at the short end with the Nutella spread to the edge, roll the dough jellyroll style, leaving it a bit loose.
  7. Cut the roll into 12 even pieces and arrange them, flat side up, in the prepared baking pan. Cover the pan with plastic wrap or place the whole pan in a large plastic bag and tie the open end closed. Refrigerate overnight or up to 24 hours.

On Baking Day

  1. Take the pan out of the refrigerator and heat the oven to 325˚F.
  2. Remove the plastic from the pan and bake the buns until they are golden-brown, about 40 minutes, or until an instant-read thermometer registers 195˚F (make sure the thermometer is in the dough, not the filling). Let the buns cool in the pan for 10 minutes, then transfer them to a wire rack and let cool.

Chocolate Peanut Butter Pocket Breads

I’ve previously written about the white bread recipe from Josey Baker Bread. While that has become one of my go-to breads when I am baking for my daughter—and each time I am thrilled with the results and simplicity of making it—it was merely a prelude, a huge tease for what was to come: Chocolate Peanut Butter Pocket Breads.

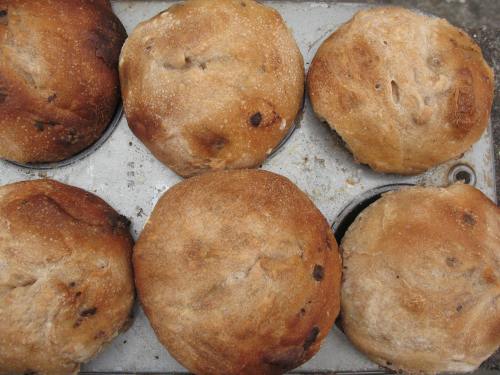
My daughter was flipping through the pages of Josey Baker Bread when her eyes glommed onto the photograph of a pocket bread that had been cut open. Melted chocolate peanut butter was oozing out, its gooeyness a hypnotic rhapsody. When she asked if I could make these, what she was really asking was when could I make them. I looked at the recipe. “This uses a sourdough starter and it has whole-wheat flour in it. You don’t like sourdough or whole wheat.” Her eyes looked like a slot machine at Vegas. Two huge chocolate peanut butter cups were staring at me. “I don’t care, dad. When could you make them?” I started mumbling about having to refresh my starter and that the pocket breads needed to rise in the refrigerator. What I didn’t let her know was that I, too, had glommed onto how much fun it would be to bake these in muffin tins. I also didn’t tell her that even though I almost never eat things like chocolate peanut butter pocket breads, I had to restrain myself from cutting out the photograph and biting into it.

My daughter had to wait impatiently before she could take her first bite. Each morning we had our ritual. She would stare at me in a pleading way and I would say, “not yet.” Of the things that my daughter doesn’t like, waiting and being teased are at the top of her list. In fairness to her, it did take three or four days, but that’s because I had to refresh my starter. As with Baker’s other recipes, you can adjust the baking schedule to fit into your day. You can even keep dough in the refrigerator for up to a week. And if sourdough isn’t your thing, you could use a recipe that is yeast-based. It did feel mischievous, chopping up peanut butter cups and adding them to the dough. It felt like I was smuggling candy into a movie theatre. These are the way to go if you’re looking to kick start your day with gooey goodness. Though they sound decadent, as with most breads with chocolate, they’re not actually sweet. My daughter did say I should use Reese’s next time instead of Trader Joes’ dark chocolate peanut butter cups and that it needed more peanut butter cups. In other words, I should use the amount called for in the recipe. I confess. It’s always hard for me to use the amount of something like chocolate that a recipe calls for but a few extra peanut butter cups would have been nice, too. Truth is, I didn’t want to buy another package of peanut butter cups.

Baker calls these “pocket breads” because they’re like bread that can fit into your pocket. He includes recipes for dark chocolate cherry, golden raisin and fennel, and bacon and sun-dried tomato pocket breads. There’s no limit to what you can throw into the dough. For now, I know the way into my daughter’s heart, even if it’s going to take more chocolate peanut butter cups.Chocolate Peanut Butter Pocket Breads

Chocolate Peanut Butter Pocket Breads (from Josey Baker Bread)

1 tablespoon (15 grams) sourdough starter
½ cup (120 grams) cool water (60°F/15°C)
¾ cup (105 grams) whole-wheat flour
1 cup (220 grams) chocolate peanut butter cups
1¼ cups (220 grams) lukewarm water (80°F/27°C)
3 cups (450 grams) bread flour
2 teaspoons (12 grams) salt

Make your sourdough pre-ferment 8 to 12 hours before you want to start mixing your dough—likely in the evening before you go to bed or in the morning. You want it to be the consistency of thick pancake batter. Put the sourdough starter, cool water, and whole-wheat flour in a big bowl. Mix it up real good. Cover with a plate or plastic wrap and leave it alone for 8 to 12 hours.

Chop your peanut butter cups into roughly ¼-in/6-mm pieces.

Mix the dough. Uncover the bowl of sourdough pre-ferment, and take a big whiff. It should be putting off a pretty strong smell, nice and yummy, maybe a touch sour. Add the lukewarm water, bread flour, salt, and chocolate peanut butter cups. Mix everything together so that it’s evenly combined, just for 30 seconds to a minute. Cover with a plate or plastic wrap, and let it sit for 30 minutes to an hour, whatever is convenient.

Gently stretch and fold the dough. Dip your hand in a bowl of water, then reach down into the side of the dough bowl, grab a little bit of it, and pull it up and push it down on top of the dough. Rotate the bowl a little bit and do it again to another portion of the dough. Give the dough about ten stretches and folds. Cover the dough, and let it sit for ½ hour.

Stretch and fold a few more times. After ½ hour, stretch and fold the dough another ten times. Cover the dough, and leave it alone for another ½ hour or so. Do this another two times, at 15- to 30-minute intervals.

If you want to shape your pocket breads in 3 to 4 hours, let the dough sit out somewhere in your kitchen. If you want to shape your pocket breads anywhere from 12 to 48 hours later, stick it in the fridge (or just outside if it’s cool out—about 45°F/7°C).

Grease your muffin tin. Use vegetable oil or nonstick spray to coat the individual cups.

Shape your pocket breads. Flour your counter and dump out the dough. Cut the dough into ¾-cup (100 gram) pieces (to fill up your muffin tin about two-thirds of the way) and use a little bit of flour on your hands to shape them into round balls. Plop the pocket breads into your muffin tin, seam-side down. When you’re all done, put the whole thing in a plastic bag, so that the tops don’t dry out.

If you want to bake your pocket breads in 3 to 4 hours, let them sit out somewhere in your kitchen. If you want to bake them anywhere from 6 to 24 hours later, stick them in the fridge (or just outside if it’s cool out—about 45°F/7°C).

Preheat. Once your pocket breads have risen, preheat your oven to 450°F/230°C for 20 minutes. If you put the pocket breads in the fridge, take them out while the oven is preheating so that they can warm up to room temperature before you bake them.

Bake your pocket breads. Take the pans out of the plastic bag, slash the top of each pocket bread with a razor, spray their tops with water, using a spray bottle, and get them in the oven. Bake for 5 minutes, then quickly open the oven, spray them again, and just as quickly close the oven. Bake for another 25 minutes, and check on them. You’ll know they are done when the slashed portions are good and dark brown.

Take the breads out of the pan, and let them cool on a cooling rack.

Rye & Caraway Bread

No matter what the time of day, everyone loves a quickie. You should’ve heard my wife, “Oh, this is so good, she moaned.” I looked at her. What about our neighbors? Or our daughter. Did you forget that she’s in the next room? “Oh, this is sooooo good.” I couldn’t get her to quiet down. “More. Give me more.” There was only one thing to do. I handed her another slice of bread and then moved the loaf out of her sight.

I usually bake bread that I start mixing the day before I plan to bake it. Although waiting 18 hours to bake bread might seem inconvenient—and to some of you—downright crazy, strangely, once you get the scheduling down, there’s a convenience to it. However, some days you just need a “quickie,” which in bread hours means taking a loaf out of the oven three to four hours after you start mixing ingredients together. My new “quickie” and as you can tell, my wife’s new favorite is the recipe for rye and caraway bread that is in Bread, the 12th and latest book written by global baker and TV host Dan Brettschneider. Click here for a link to a short video of Brettschneider kneading dough.

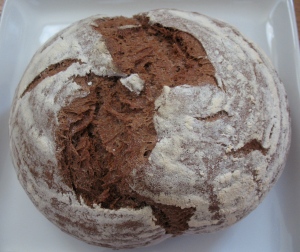
I was looking for a loaf of bread that didn’t require a long fermentation so that we could eat it with dinner. I also thought it would be a nice change of pace from the breads that I had been baking. Brettschneider first experienced this bread when he was eating a sandwich at a Jewish deli in New York. I seriously underestimated how good this would taste. Cocoa powder produced a dark crumb color and filled my kitchen with a chocolaty aroma. In a way, it did transport me back to the streets of my old neighborhood in Brooklyn, when, on my way home from the bakery, I would keep reaching into the waxed bag containing a loaf of rye bread that I was supposed to be bringing to my family. I rarely eat pastrami or corned beef anymore but after the first bite I was ready to drive to Costco and buy kosher pastrami. Brettschnieder suggests trying it with pulled pork. Maybe, but to the Brooklyn boy in me, that just sounds sacrilegious.

I tend to favor the flavor and depth of character in breads that use very little yeast and have long rises. This bread reminds me that sometimes there’s nothing better than a “quickie.” I think my wife would agree. She’s having another slice.Rye_&Caraway_BreadRye & Caraway

Rye & Caraway Bread (from Bread by Dean Brettschneider)

Generous 2 cups (350 grams) bread flour

1½ cups (150 grams) rye flour

2 teaspoons (10 grams) salt

2 heaping teaspoons (10 grams) sugar

2½ teaspoons (7 grams) yeast

2 teaspoons olive oil

2¾ tablespoons (15 grams) cocoa powder

1½ teaspoons (10 grams) molasses

3 tablespoons (20 grams) caraway seeds

1⅓ cups water

Place all dry ingredients in a large mixing bowl. Add water, olive oil, and molasses, and mix together to form rough dough.

Knead for up to fifteen minutes, either by hand or in a mixer, until the dough is smooth and elastic.

Cover the bowl and let the dough rise until double in bulk (about an hour), then stretch the dough up and over itself a few times to deflate it very gently. Cover, and leave for another half an hour.

Gently tip dough onto a floured work surface and very gently shape it into a round ball.

Allow the dough to rest for fifteen minutes or so, then flatten the dough and repeat the process. Gently place in a flour-dusted banneton (or bowl). Cover and let it rise for another hour.

Preheat oven to 500°. Place dough into oven and create steam by either spritzing with water or pouring 1 cup of boiling water onto a tray. Bake for 20 minutes. Rotate bread and reduce temperature to 400°. Bake for an additional 20 minutes. Loaf should be dark golden brown in color. Allow to cool completely on a wire rack.

Chocolate-Coconut Bread

“His loaf has more chocolate chips than the one you last baked for me!” my daughter said as her sibling-rivalry-double-x-ray vision started to bore holes through the bread that I made for my son. Each semester when he heads back to college, I bake my son a loaf of chocolate-coconut bread to carry on the plane. Maybe my daughter had a point. She also could’ve been wrong. All I knew is that I didn’t want her pointing her double-x-ray vision at me. Who knew what she would find? Nevertheless, when I started to explain that I usually don’t weigh the chips, she looked at me with a—you’ve got to be kidding me—glare. “You are going to put more chocolate chips in the next loaf that you bake for me. Thanks, dad.”

Chocolate. Chocolate-coconut. Chocolate-coconut bread. Three words linked together like a copywriter’s dream. This bread makes everyone smile. Just writing that line makes me want to get up and start mixing a loaf. Thirty seconds of mixing is all that is required because you don’t have to knead the dough. Jim Lahey, who started the no-knead craze, created this recipe after tasting a loaf of coconut bread at a Jamaican spot that was near his bakery. The addition of chocolate to the recipe was inspired by his childhood passion for Mounds bars. This bread isn’t as rich as it sounds. Other than chocolate, there’s no sugar or butter in the recipe. It’s perfect for breakfast, though I wouldn’t fault you for eating it any other time of the day. I do, however, want to warn you that as the bread bakes, the scent from the one-two combination of chocolate and coconut will drive you crazy. As Odysseus resisted the temptation of the Sirens, you too must resist your uncontrollable urge to cut or rip off a piece as soon as you take it out of the oven. As with all bread, this needs to cool down before you can cut into it.

I baked a loaf while my son was home during his break from school because I wouldn’t be able to bake one for him to take on the plane. I could hear my daughter’s voice as I added chocolate chips to the flour. Maybe I added more. Maybe I didn’t. “Dad,” she said, after eating a few slices. I was waiting for her to bust me on a technicality that I didn’t bake it solely for her. “Do you remember the bread with poppy seeds and onions? When can you bake that for me?” Here we go again. How much onion did I use the last time I baked it? chocolate-cranberry bread

Coconut-Chocolate Bread (Jim Lahey’s recipe)

2 cups + 2 tablespoons (280 grams) all-purpose flour
2 cups (100 grams) unsweetened large-flake coconut
1 cup (150 grams) semisweet chocolate chunks
¾ teaspoon (4 grams) salt
¼ teaspoon (1 gram) yeast
1¼ cups (280 grams) water

I use the same amount of chocolate and coconut as Jim Lahey does, but I increase the amount of flour to approx. 4 cups (453 grams) and water to 1½ cups (350 grams). I also use a bit more salt (8 grams/1½ teaspoons).

Mix together flour, half the coconut, the chocolate, salt, and yeast. Add water and stir for about 30 seconds. The dough should be wet and sticky. Cover bowl with plastic and let sit for 12-18 hours. Dust your counter with a generous amount of flour. Scrape the dough out of your bowl in one piece. Gently shape the dough to make a round loaf. After rounding, place on a towel that has been dusted with flour. Sprinkle with remaining coconut and fold the top of the towel over it (or cover with another towel). Let it rise for about 1½ hours. Halfway through the rise, place a Dutch oven with its lid on in the oven and pre-heat oven to 475°. Remove Dutch oven and carefully plop the dough into the pot. Replace lid and bake covered for 30 minutes. Lower the oven temperature to 450°. Remove lid and continue baking an additional 15 minutes. Lift the bread out of the Dutch oven and place it on a rack to cool thoroughly.

This recipe also works well for chocolate-cherry bread or chocolate-cranberry bread. Just replace the coconut with dried cherries or cranberries.

Josey Baker Bread — Your First Loaf Of Bread

Opening a new cookbook is like going on a first date. The attraction is already there and now you want to find out their story—what exists between the covers—and will that story lead to a second date.

The subheading to Josey Baker Bread is Get Baking • Make Great Bread • Be Happy! There is a photo on the cover of Josey Baker (yes, that is his real name) patting butter on a piece of bread. He has a huge smile on his face. Like Baker, I am always thrilled taking a loaf out of the oven. It’s a miracle to behold and celebrate and, I admit, drone on about with endless excitement. Without even cracking open the cover, I was ready for the second date.

“You’ve got to get obsessed and stay obsessed,” the author, John Irving, writes in his novel, Hotel New Hampshire. That line has always stuck with me. When my wife reads this she will most likely say, “Of course, you would like that line. You obsess about everything.” Does obsession mean spending days writing one sentence? Lying awake dreaming about bread? That’s passion, not obsession. I love reading cookbooks where the cook or author is part shaman, part life coach, part butt kicker, part proselytizer, and totally obsessed—I mean passionate. Baker is all of these, which is why I am willing to overlook his occasional lapses into hipster speak.

Like a good loaf of bread, this book just feels at home in my hands. Chapters are divided into lessons that progress in difficulty. I hesitate using the word difficulty, because that is the last word that Baker would use. Mention the word difficulty and some of you—you know who you are—will rush off and order a pizza. These lessons are more like steps, baby steps that lead into the next chapter. Like all relationships, you are building trust and confidence. Lesson One is “Your First Loaf of Bread.” I had the perfect excuse to follow Lesson One. My daughter, who likes her bread as white as fresh snow, had asked recently if I could bake her a bread that wasn’t round and didn’t have a hard crust. I knew that the bread in Lesson One would be right up her alley. I have to admit that I, too, was looking for a change in my routine. I could’ve easily passed on this lesson but I’m glad I didn’t. It provides a framework for the rest of the book. If you follow Baker’s instructions, your first loaf won’t just be your first loaf; it will be a damn good loaf of bread. After getting comfortable with the recipe, you can start fiddling around with it, if you so choose.

The Rolling Stones weren’t singing about baking bread when they sang, “Time is on your side,” but it has become the bread baker’s mantra. Let time do the kneading. Let time develop the character of the bread. Here are the directions for the lesson: mix ingredients together until there isn’t any dry flour left, then cover with plastic wrap and let sit for three hours at room temperature. The next step is to put the dough in the refrigerator for at least a day (up to a week). This is because it is easier to work with dough when it is cold. Keeping it in the fridge for a longer time will also add to the flavor of the bread. I think it would be interesting to set up a blind tasting of breads based on the length of time in the refrigerator. If you simply can’t wait, Baker offers you an out: a minimum of three hours will cool down your bread and then you can proceed. Shape the loaf and plop it into an oiled or greased loaf pan. Spray or brush the top of the loaf with oil and cover it with aluminum foil. You’re supposed to tent the foil so that the dough has room to rise. I shiver with fear at anything that resembles an arts and crafts project so I had a bit of a problem with my initial attempt at tenting. My tenting did, however, improve with each loaf that I made. The loaf rises for about four hours at room temperature. It can also sit in the fridge for up to three days before you take it out and bake it. Just keep in mind that the loaf needs to come to room temperature before baking it (you can leave it out while heating the oven). Bake it at 475° for about 40 minutes.

Josey Baker First Loaf Of Bread

Josey Baker First Loaf Of Bread

Don’t get hung up on the time that it takes to bake the breads in this book. Active time is minimal and once you figure out a schedule that works, you will be rewarded over and over. My family really liked this bread. If you’ve read my other postings, you know that I usually bake bread with a variety of whole grain flours. When I do bake white bread, it is because it makes my daughter happy. This bread made her very happy. I also had a smile on my face when I snuck a piece or two. Tasting the first slice, the end piece, with a cup of coffee, is not a bad way to start the day. I do have one warning. I thought there was too much salt in this and other recipes and I wasn’t the only one in my family who thought that. Subsequent loaves tasted better after I reduced the amount of salt. Maybe you should bake your first loaf as directed before fiddling with amount of salt. Here is a link to the recipe.

My daughter was camped out on the couch, wrapped in two or three blankets like they were lifejackets. She was sick and tired. Sick of being sick and tired of being tired. “How about some chicken soup? Tea?” She shook her head. Like a priest administering last rites, I leaned in closer to listen to her deathly whisper. “Father?” “Yes, my child.” “Father?” “Yes, my child.” “Father, can I have some bread?” Every time I checked on her it was the same ritual, ending with “Can I have some more bread.” When my wife came home later she asked what our daughter had to eat. “Bread,” I said. “Bread? That’s all she had all day long.” “No,” I said. “What else did she have?” “Butter.”

Whole-Wheat Hamburger Buns

An anthropologist would have a field day examining the contents on top of our pool table. Abandoned socks, books, stuffed animals, shoe laces, store receipts, packs, purses, hangers, extension cords, piles of clothing that needed to be sorted through—everything except pool balls and cue sticks. Every so often, I stuff a bag to take to the thrift store, briefly exposing a patch of green felt that is visible only until I climb down the stairs yet again with another bag from moments of our lives that I am not ready to free into the wide world beyond.

Often, when I am down in the basement putting up a load of laundry, I walk over to the pool table and visit the copy of the magazine Eating Well, Summer 2002 that has also taken up residence on the table. When I pick it up I feel that I am having a conversation with an old friend. It lives on the tabletop, consorting with a pair of soccer cleats that almost kicked the winning goal, or with an air pump that we keep forgetting is hiding there, or with song lyrics on a sheet of paper that I keep adding to when I can find a pen. There is something comforting about seeing the magazine sticking out from the clutter. I have trained my fingers to open up to the article titled, “red-hot & irresistible,” thinking that it has to be about me, only to be disappointed when I find it is really about chili peppers. My disappointment is short-lived though, when I look at the recipe for mojo rojo. Try this: Say mojo rojo as many times as you can in 30 seconds, making sure that you trill your tongue on the letter “r”. Are you giddy? Is the world now a better place? You can send me a check in the mail or pay me through paypal.

There is also an article in that issue about veggie burgers. For some reason, I’ve just always overlooked it—and not because the world doesn’t need another veggie burger recipe or that I think that veggie burger is an oxymoron. We used to make them and when viewing the article, I am reminded that we should start making them again. If you’ve been reading my musings, you would know that I am usually looking for ways to repurpose leftovers such as grains or beans. Veggie burgers are a great way to do this. I could continue to rhapsodize about veggie burgers, however, what really caught my eye was the recipe for whole-wheat hamburger buns. How could I have missed that?

Whole-Wheat Hamburger Buns

Whole-Wheat Hamburger Buns

What I like about this recipe, other than the inclusion of whole-wheat flour, is that it has less oil or butter or sugar than most hamburger bun recipes, without sacrificing taste. That they’re rustic looking is also a plus. I brush them with water and sprinkle on sesame seeds because I think that gives them a nice touch. These are perfect to bring the next time you are invited to a cookout or barbecue.

I’m gathering laundry right now. I have an old friend to visit in my basement.

Caramelized Onions and Rolls

Of the four elements, the onion is like the earth that balances the fire. A humble servant, it forever wants to be liked and always tries to please. It is like your best friend who brings you soup when you are sick. The ring bearer who knows that it is your day.

And how do we treat our best friend, the onion? We hide it in the basement. Toss it in a drawer. Forget about it until it starts to sprout green ears.

Many years ago, I loaded crates of onions onto awaiting trucks on an onion muck in Oswego, NY. Every night I came home wearing new layers of dirt. The wet earth lived inside my nostrils. When it rained, the crates doubled their weight. I sustained myself with peanut butter and banana sandwiches. The few weeks that I did this defined for me what hard work is. I learned that not only were onions bad for your breathe but they were also bad for your back—at least my back. I can’t say that I experienced a romantic back-to-the-land moment. I didn’t. But holding an onion in my hand has become a grounding experience. Once my knife penetrates that first layer of the onion, I know that my family will have a home cooked meal.

When I want to move onions from the supporting cast to center stage, I caramelize them. I slice two or three onions and let them simmer in a pan with a few splashes of olive oil for about 30-40 minutes. Stirring is the enemy of caramelization. An occasional stir or shaking of the pan is all that is needed. Cook until they are golden brown. Let the onions sing their song. You will know they are ready when pesky family members decide that the kitchen is the only place in the house where they want to be. My wife loves scraping the pan for burnt pieces. You might want to keep a flyswatter nearby. Caramelized Onions

Like onions, rolls are workhorses. And like onions, they are often taken for granted. They are also overly sensitive to the weary voices of deli clerks asking, “What type of roll do you want that on?” Rolls are bread’s stepchildren and wear IWTBL (I Want To Be Loved) t-shirts in all colors. They are fond of accessorizing with poppy seeds, sesame seeds, rolled oats, and when they’re feeling down, a pick-me-up of egg wash. Unlike one who is on a lifetime diet, rolls don’t seem to mind what shape they’re in. Round, oval, knotted, square, baked together in a pan; they know they look beautiful no matter what their shape. When I make challah, I usually bake two loaves, often giving the second one to a friend. But sometimes I shape the second one into rolls for burgers. I especially like them with wild Alaskan salmon burgers that I buy at Costco. Ten or so minutes in the frying pan makes it for a really quick meal. And nothing sits better on that burger than a heap of caramelized onions. Challah RollsOne of my favorite roll recipes is Peter Reinhart’s Hoagie and Cheesesteak roll, though I have to admit I’ve never had a cheesesteak on one. I usually opt for chicken apple sausage, topped, of course, with caramelized onions and served with potato salad or oven fries and coleslaw on the side. You have to plan ahead for these because they require an overnight fermentation, but you don’t have to bake the rolls until the next day. The dough can keep in the refrigerator for up to 4 days. Shape and you are ready to go. Get crazy and even caramelize some red peppers along with the onions.
A roll and caramelized onions glom onto each other like two teenagers sitting in the backseat of a car at a drive-in movie theatre. I’m not sure if I use caramelized onions as an excuse for baking rolls or baking rolls as an excuse to caramelize onions.

Either way, it’s a win-win situation. Hoagies and  Cheesesteak Rolls

Hoagie and Cheesesteak Rolls (Makes 10 Seven-Inch Rolls Or 5 Foot-Long Rolls)

5 13cups (24 oz/680 g) bread flour
2 teaspoons (0.5 oz/14 g) salt, or 1 tablespoon kosher salt
1 tablespoon (0.5 oz/14 g) sugar
1½ teaspoons (0.5 oz/5 g) barley malt syrup, or ¾ teaspoon (0.17 oz/5 g) diastatic malt powder (optional)
1 egg
3 tablespoons (1.5 oz/43 g) vegetable oil
1 cup (8 oz/227 g) lukewarm water
½ cup plus 2 tablespoons (5 oz/142 g) lukewarm milk
2¼ teaspoons (0.25/7 g) instant yeast

Do Ahead
1. In a mixing bowl, whisk the flour, salt, and sugar together. In a separate bowl, whisk the malt syrup, egg, and oil together. Separately, combine the water and milk, then whisk in the yeast until dissolved.
2. Add the oil mixture and the water mixture to the dry ingredients. If using a mixer, switch to the dough hook and mix on the lowest speed, or continue mixing by hand, for 4 minutes to form a coarse ball of dough.
3. Let the dough rest for five minutes.
4. Knead for 2 minutes more on medium-low speed or by hand with a spoon, adjusting with flour or water as needed to form a smooth, supple, and tacky but not sticky dough.
5. Transfer the dough to a lightly floured work surface and knead for 1 minute, working in more flour or water as needed.
6. Form dough into a ball.
7. Place dough into a greased container, cover, and place in the refrigerator overnight or for up to 4 days.

On Baking Day
8. Remove the dough from the refrigerator about 2 hours before you plan to bake and transfer it onto a floured work surface – divide the cold dough into 4-ounce (113 g) pieces for 7-inch rolls or 8-ounce (227 g) pieces for foot-long rolls.
9. Flatten each piece of dough with your hand, then form it into a 4-inch torpedo shape, or a 7-inch torpedo shape for foot-long rolls, much as you would do for a batard. Let each piece of dough rest as you move on to the other pieces.
10. When you return to the first torpedo, gently roll it back and forth to extend it out to about 7 inches, or 13 inches for a foot-long roll. The roll should only have a slight taper at the ends.
11. Place the rolls on a sheet pan lined with parchment paper or a silicone mat with about 2 inches between the rolls. Mist the tops of the rolls with spray oil, cover loosely with plastic wrap, then let the dough rise at room temperature for about an hour.
12. Preheat the oven to 425. Place a steam pan in the oven (a cast-iron frying pan or sheet pan works just fine).
13. Remove the plastic wrap from the rolls. Continue to proof the dough for another 15 minutes, uncovered. The dough will rise only slightly—not more than 1½ times its original size.
14. Use a sharp serrated knife, lame, or razor blade to cut a slit down the center of the roll (about 1/4 inch deep). Let dough proof for 15 minutes after you make the cuts.

Transfer the rolls to the oven, pour 1 cup of hot water into the steam pan, then lower the oven temperature to 400.
▪ Bake for 10 minutes, then rotate the pan and bake for another 10-20 minutes, until the rolls are light golden brown and their internal temperature is 190 in the center.

Feel free to substitute whole wheat flour or other whole grain flours for some of the bread flour, If you do so, increase the water by about 1 tablespoon (0.5 oz/14 g) for every 7 tablespoons (2 oz/56.5 g) of whole grain flour you substitute.

Celia’s Rugelach

Lovin Spoonful is the name of a band that was popular in the 60s. Years ago, I changed the colors in my crayon box, exchanging the grey skies of a New York winter for the golden-orange welcome mat of San Francisco. I was giddy those first days. “Do You Believe In Magic” was the song playing in my head. Yes, I said. I believe in magic.

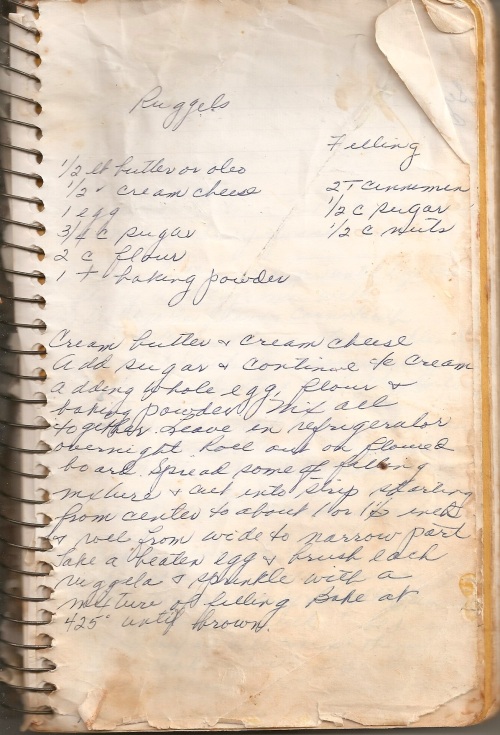
I’ve been thinking about my mother-in-law, who died last week. She wasn’t the best cook, but she dished out plenty of spoonfuls of lovin during her almost 92 years. Hers was a quiet presence; she inhabited the spaces between words and the corners of rooms. Her love didn’t need words. While her husband was the exclamation point at the end of a sentence, she was the parenthesis, often containing a meaning within the meaning of what she said. Her observations were always spot on, even when she was struggling with dementia at the end of her life.

Three of her grandchildren spoke at her funeral. Like a Greek chorus, they provided commentary and brought back the spirit that was missing during the last years of her life. Through them you could feel the love that she and her husband passed down. They talked about how their grandmother cared for them when they were sick. Tofutti Cuties in the freezer. Rugelach. Mandel bread. Their grandmother’s selflessness. That in spite of their grandmother’s problems walking, each step she took was a victory over her pain.

It has become a tradition in our family that when a loved one dies, we cook one of their recipes. When my wife’s grandmother died, she made her chicken fricassee. It was the first—and I think, last time—that she cooked this dish. Chicken fricassee will never taste as good as it did that night. The morning after we found out that her mother had died, my wife scanned her mom’s handwritten recipes for rugelach, mandel bread, and chocolate mousse pie and sent them to her sister so that she and one of her daughters could make them. They were waiting for us when our plane landed in New York. Her chocolate mousse pie was a family favorite, even after it was discovered that cool whip was one of the main ingredients. There was always a chocolate mousse pie sitting in her freezer, on the ready should anyone drop by. I’m sure there’s one in her freezer in heaven.

I pick up my mother-in-law’s cookbook and see the creases and stains in the pages of her recipes. A life was lived. Her life mattered.

A lifetime of photographs is scattered across our table. “Do you believe in magic in a young girl’s heart?” I look across at my wife and then at my daughter seated next to her. I do.

Celia's Rugelach

Perfectly Good

I used to think that good was the enemy of great—an acceptance that you couldn’t or didn’t want to make something better, that you had grown weary of trying and had given up. In your resignation, your half-hearted admission of defeat, you somehow convinced yourself that it really was good enough, not great, but good enough, and that, in itself meant it wasn’t really that bad, not bad at all, maybe even good, just good enough to be perfectly good.

Perfectly good celebrates the simplicity of the ordinary: unadorned, unencumbered, and virtuous. Stripped away of all pretense, it has the promise of an empty room, freshly painted, the hope of the first spring rain, and the familiarity and comfort of an old sweater.

Perfectly good is the sound of popcorn kernels ricocheting against a blackened pot, knowing that you will happily be smuggling it into the movie theatre. It is the clanking of a knife in a jar of peanut butter, and then wiping it off on the other slice before dipping it into the jar of jam, pretending that you weren’t the one that smeared the peanut butter into the jam jar. Peanut Butter & Jelly It is a glass of milk, well, just because. It is eating a bowl of yogurt and stone fruit every day for lunch and still looking forward to having it again the next day. It is a bowl of warm oatmeal with a sprinkle of cinnamon. It is rice and beans because they are the best of dance partners. It is taking leftover pasta out of the refrigerator and eating it while waltzing around the kitchen singing the lyrics to one of the stupidest top 40 songs because it has been residing in your brain for days and doesn’t everyone do this when they think no one is watching? It is a supper of scrambled eggs on a roll with just enough ketchup to celebrate one of your guilty pleasures of childhood. It is a handful of walnuts and cranberries to keep away the demons of hunger. It is a salad of tomatoes and avocados with just a touch of salt. QuesadillaIt is cheese melting in a tortilla, no salsa, no jalapeños, just cheese pulling away from the tortilla and while you’re eating that one, you throw down the next one, because you know that it tastes good, good enough to be perfectly good.

What do you find that is good enough to be perfectly good?

Focaccia: A Baker’s Tale

They were the Morengellos, two brothers and a cousin: Dom, Vince, and Joey. It was their grandmother, Rosemarie, who named them the Focaccias because of their dimples. Rosemarie, who loved Italian art songs, encouraged their singing and performing and introduced them to melancholy and angst, the cruelty of love, and that the heart weeps forever – all suitable topics for teenage torment. As the Focaccias, they sang at family gatherings, parties, and street fairs, such as the Feast of San Gennaro, where so thunderous was their performance that when they sang the line Vissi nel tuo respiro (I lived in your breath) fairgoers had to stop whatever they were doing to wipe away tears, using napkins saturated with grease from zeppole that they had just scarfed down, causing them to forever associate that greasy smell with being in love. As the Dimples, they stood shoulder to shoulder on the street corners of Brooklyn, singing doo-wop to the stars and the heavens and to anyone who walked by, burning with the immensity of their dreams. But Rosemarie did more than give them a name. She also taught them that to take a bite of focaccia is to taste the earth and soil, heart and soul of the world. While dimpling the dough that she had stretched out on a baking pan, Rosemarie would teach them about flour, yeast, and water, telling them not to add extra yeast to quicken the rising time because, like love, you should never hurry the dough. Lastly, she told them that when love or life was making you pazzi in testa (crazy in the head) it was time to knead the dough.

Rosemary Focaccia

Rosemary Focaccia

That’s one baker’s tale and you can choose to believe it…or not. As for me, focaccia is both doo-wop and Italian art song, the rhythm of the street corner and three voices singing into the night, the laughter of family and the love of a grandmother. Too often focaccia is thought of as bread for beginning bakers. Although there might be some truth to that because it doesn’t involve shaping or rounding or forming baguettes, focaccia is very much like an artist’s palette. What I love about it is its versatility. It’s an improviser’s delight; you can play with different flours, use a biga or a sponge, let it rise in the refrigerator, or it can be ready for your first bite within a few hours after kneading. It can be round or square, savory or sweet. You can dress it up and take it anywhere or keep it as humble as a starched white shirt. Dot its landscape with olives, onions, tomatoes, peppers, potato slices, or fresh fruit such as grapes, or strawberries. Paint it with tomato or pesto sauce. Scatter herbs with a few sweeps of the hand. One of my favorite combinations is Gorgonzola, red onion and walnuts.

Focaccia with roasted peppers and goat cheese

Focaccia with Roasted Peppers and Goat Cheese

I’ve been sworn to secrecy so I can’t reveal Rosemarie’s recipe. However, I encourage you to try Carol Field’s recipes from any of her following books: Focaccia, The Italian Baker, or Italy in Small Bites, especially the onion-covered bread ring. Below is her basic focaccia recipe. If you really want a hero’s welcome, bring one of Nancy Silverton’s focacce to a dinner party or gathering. I have to admit that I do reduce the amount of olive oil called for in her recipe. Amy Scherber’s focaccia recipe also has a special place in my heart, as does her rustic Italian bread. Lately, I’ve been baking breads from Flour Water Salt Yeast, where each recipe make two breads. I’ve been sticking the dough for the second loaf in the refrigerator and taking it out a day or two later and baking focaccia. Removing it from the oven, it looks like it has been colored by the Italian sun and the singing of Brooklyn nights.

Sweet_Focaccia

Sweet Focaccia

Carol Field’s Basic Focaccia

SPONGE:
1 teaspoon active dry yeast
1/2 cup warm water, 105° to 115°F
3/4 cup (100 grams) unbleached all-purpose flour

DOUGH
1 teaspoon active dry yeast
1 cup warm water, 105° to 115°F
3 tablespoons extra virgin olive oil
Sponge from above
314 cup (450 grams) unbleached all-purpose flour
2 teaspoons sea salt

TOPPING
2 tablespoons extra virgin olive oil
1 to 114 teaspoon coarse sea salt

To make the sponge: Sprinkle the yeast over the warm water in a large mixing or mixer bowl, whisk it in, and let stand until creamy, about 10 minutes. Stir in the flour. Cover tightly with plastic wrap and let rise until very bubbly and doubled, about 45 minutes.

To make the dough: Sprinkle the yeast over the warm water in a small bowl, whisk it in, and let stand until creamy, about 5 to 10 minutes. With a wooden spoon, stir the yeast mixture and olive oil into the sponge and mix with a paddle attachment until well blended. Add the flour and salt and stir until thoroughly mixed, 1 to 2 minutes. Change to the dough hook and knead at medium speed until the dough is soft, velvety and slightly sticky, 3 to 4 minutes. Finish by sprinkling 1 tablespoon of flour on your work surface and kneading the dough briefly until it comes together nicely.

First Rise. Place the dough in a lightly oiled container, cover it tightly with plastic wrap, and let rise until doubled, 114 hours.

Shaping and second rise. The dough will be soft, delicate, and full of air bubbles. Flatten it on an oiled 11×17 inch baking pan and press it out with oiled or wet hands. Because the dough will be sticky and may not cover the bottom of the pan, cover it with a towel and let it relax for 10 minutes, then stretch it again until it reaches the edges. Cover with a towel and let rise for 45 minutes to 1 hour or until the dough is full of air bubbles. Just before baking, dimple the dough vigorously with your knuckles or fingertips, leaving visible indentations. Drizzle olive oil over the dough, being sure some of the oil pools in the little holes you have made. Sprinkle with coarse sea salt.

Baking. At least 30 minutes before you plan to bake preheat the oven to 425°F with a baking stone inside if you have one. Place the focaccia pan directly on the stone and spray the oven walls and floor with cold water from a spritzer bottle 3 times during the first 10 minutes of baking. Bake until the crust is crisp and top is golden, about 20 to 25 minutes. You may remove the focaccia from the pan and bake it directly on the baking stone for the last 10 minutes. remove from the pan immediately and place on a rack. Serve warm or at room temperature.

Makes one 11 x 17 inch focaccia.